Indulge in Your Own Baking: DIY Cake Tutorial
12.10.2023 posted by Admin
Do you have a sweet tooth and love the satisfaction of baking your own creations? If so, then you'll love this DIY Cake Tutorial! In this tutorial, we'll provide step-by-step instructions on how to make a delicious cake from the comfort of your own home. Not only will you be able to customize your cake to your liking, but you'll also get the joy of seeing it come to life. So let's get started on this fun and easy baking adventure!
Gather Ingredients and Equipment
Before you start baking, make sure you have all the necessary ingredients and equipment on hand. For this DIY cake tutorial, you'll need basic ingredients like flour, sugar, butter, eggs, and baking powder. Depending on the flavor you want, you can also gather additional ingredients like cocoa powder, vanilla extract, or food coloring. In terms of equipment, you'll need measuring cups and spoons, mixing bowls, an electric mixer or whisk, a cake pan, and a spatula for smoothing the batter. Take the time to gather everything you need before you begin, so you can have a smooth and enjoyable baking experience.
Prepare Cake Batter
Now that you have gathered all the necessary ingredients and equipment, it's time to prepare the cake batter. Start by measuring out the flour, sugar, baking powder, and any additional flavorings you want to use, such as cocoa powder or vanilla extract. In a mixing bowl, combine these dry ingredients and give them a good whisk to ensure they are evenly mixed. In a separate bowl, cream together the butter and sugar until light and fluffy. Add in the eggs, one at a time, mixing well after each addition. Gradually add the dry ingredients to the wet ingredients, alternating with any liquid ingredients, until a smooth batter forms. Make sure to scrape down the sides of the bowl to ensure everything is fully incorporated. And voila! Your cake batter is now ready to be poured into the prepared cake pan. Get ready to bake up a delicious treat!
Grease and Flour Cake Pan
To ensure your cake comes out of the pan easily and in one piece, it's important to grease and flour the cake pan before pouring in the batter. Greasing the pan prevents the cake from sticking to the sides, while the flour creates a barrier between the batter and the pan, allowing for easy release. Start by generously greasing the sides and bottom of the pan with butter or cooking spray. Then, dust the greased pan with flour, making sure to cover every surface. Tap out any excess flour. This simple step will make it a breeze to remove your cake from the pan once it's baked, ensuring a picture-perfect dessert every time.
Bake the Cake
Now it's time for the most exciting part - baking the cake! Preheat your oven to the specified temperature in the recipe. Carefully pour the prepared cake batter into the greased and floured cake pan, ensuring it's spread evenly. Place the pan in the preheated oven and set a timer according to the recipe instructions. While the cake bakes, resist the temptation to open the oven door too often, as this can cause the cake to sink. Instead, sit back and enjoy the delightful aroma that fills your kitchen as the cake rises and bakes to perfection.
Test for Doneness
Once the timer goes off, it's time to test if your cake is done. Carefully insert a toothpick or cake tester into the center of the cake. If it comes out clean or with just a few crumbs clinging to it, your cake is ready! However, if the toothpick comes out with wet batter, it needs a little more time in the oven. Place the cake back in the oven for a few more minutes and repeat the toothpick test until it comes out clean. Remember, it's better to slightly overbake the cake than to underbake it. This ensures a moist and fluffy texture. So take your time and keep testing until perfection is achieved!
Let Cool
After your cake is done baking, it's important to let it cool completely before moving on to the next step. Cooling allows the structure of the cake to set and firm up, ensuring a perfect texture and easier handling. So, resist the temptation to dive right in! Instead, carefully remove the cake from the oven and place it on a wire rack. Let it sit undisturbed for at least 20-30 minutes, or until it's completely cooled to room temperature. This waiting time may seem long, but trust me, it's worth it! Patience is key in achieving a deliciously moist and well-rounded cake.
Add Frosting and Decorations
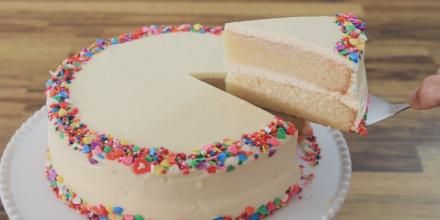
Now that your cake has cooled, it's time to get creative with the frosting and decorations! Start by choosing your favorite type of frosting, whether it's classic buttercream, rich cream cheese, or decadent ganache. Using a spatula or piping bag, spread a generous layer of frosting all over the cake, making sure to cover the top and sides evenly. Then, let your imagination run wild as you add decorations like sprinkles, chocolate curls, or fresh fruit. You can even try your hand at piping intricate designs or writing personalized messages on top. The possibilities are endless! So have fun, express yourself, and make your cake a true work of art.
Serve and Enjoy!
Now that your cake is beautifully frosted and decorated, it's time to indulge in your delicious creation! Gather your loved ones around the table and slice into the cake to reveal its moist and flavorful layers. Take a moment to appreciate the hard work and creativity that went into making this masterpiece. Each bite is a symphony of flavors and textures that will surely delight your taste buds. Share this homemade treat with family and friends, or simply savor it all to yourself. Whatever you choose, be sure to enjoy every single bite. Remember, the best part of baking is the joy it brings when you share your tasty creations with others. So go ahead, dig in, and revel in the sweet rewards of your DIY cake!
Gather Ingredients and Equipment
Before you start baking, make sure you have all the necessary ingredients and equipment on hand. For this DIY cake tutorial, you'll need basic ingredients like flour, sugar, butter, eggs, and baking powder. Depending on the flavor you want, you can also gather additional ingredients like cocoa powder, vanilla extract, or food coloring. In terms of equipment, you'll need measuring cups and spoons, mixing bowls, an electric mixer or whisk, a cake pan, and a spatula for smoothing the batter. Take the time to gather everything you need before you begin, so you can have a smooth and enjoyable baking experience.
Prepare Cake Batter
Now that you have gathered all the necessary ingredients and equipment, it's time to prepare the cake batter. Start by measuring out the flour, sugar, baking powder, and any additional flavorings you want to use, such as cocoa powder or vanilla extract. In a mixing bowl, combine these dry ingredients and give them a good whisk to ensure they are evenly mixed. In a separate bowl, cream together the butter and sugar until light and fluffy. Add in the eggs, one at a time, mixing well after each addition. Gradually add the dry ingredients to the wet ingredients, alternating with any liquid ingredients, until a smooth batter forms. Make sure to scrape down the sides of the bowl to ensure everything is fully incorporated. And voila! Your cake batter is now ready to be poured into the prepared cake pan. Get ready to bake up a delicious treat!
Grease and Flour Cake Pan
To ensure your cake comes out of the pan easily and in one piece, it's important to grease and flour the cake pan before pouring in the batter. Greasing the pan prevents the cake from sticking to the sides, while the flour creates a barrier between the batter and the pan, allowing for easy release. Start by generously greasing the sides and bottom of the pan with butter or cooking spray. Then, dust the greased pan with flour, making sure to cover every surface. Tap out any excess flour. This simple step will make it a breeze to remove your cake from the pan once it's baked, ensuring a picture-perfect dessert every time.
Bake the Cake
Now it's time for the most exciting part - baking the cake! Preheat your oven to the specified temperature in the recipe. Carefully pour the prepared cake batter into the greased and floured cake pan, ensuring it's spread evenly. Place the pan in the preheated oven and set a timer according to the recipe instructions. While the cake bakes, resist the temptation to open the oven door too often, as this can cause the cake to sink. Instead, sit back and enjoy the delightful aroma that fills your kitchen as the cake rises and bakes to perfection.
Test for Doneness
Once the timer goes off, it's time to test if your cake is done. Carefully insert a toothpick or cake tester into the center of the cake. If it comes out clean or with just a few crumbs clinging to it, your cake is ready! However, if the toothpick comes out with wet batter, it needs a little more time in the oven. Place the cake back in the oven for a few more minutes and repeat the toothpick test until it comes out clean. Remember, it's better to slightly overbake the cake than to underbake it. This ensures a moist and fluffy texture. So take your time and keep testing until perfection is achieved!
Let Cool
After your cake is done baking, it's important to let it cool completely before moving on to the next step. Cooling allows the structure of the cake to set and firm up, ensuring a perfect texture and easier handling. So, resist the temptation to dive right in! Instead, carefully remove the cake from the oven and place it on a wire rack. Let it sit undisturbed for at least 20-30 minutes, or until it's completely cooled to room temperature. This waiting time may seem long, but trust me, it's worth it! Patience is key in achieving a deliciously moist and well-rounded cake.
Add Frosting and Decorations
Now that your cake has cooled, it's time to get creative with the frosting and decorations! Start by choosing your favorite type of frosting, whether it's classic buttercream, rich cream cheese, or decadent ganache. Using a spatula or piping bag, spread a generous layer of frosting all over the cake, making sure to cover the top and sides evenly. Then, let your imagination run wild as you add decorations like sprinkles, chocolate curls, or fresh fruit. You can even try your hand at piping intricate designs or writing personalized messages on top. The possibilities are endless! So have fun, express yourself, and make your cake a true work of art.
Serve and Enjoy!
Now that your cake is beautifully frosted and decorated, it's time to indulge in your delicious creation! Gather your loved ones around the table and slice into the cake to reveal its moist and flavorful layers. Take a moment to appreciate the hard work and creativity that went into making this masterpiece. Each bite is a symphony of flavors and textures that will surely delight your taste buds. Share this homemade treat with family and friends, or simply savor it all to yourself. Whatever you choose, be sure to enjoy every single bite. Remember, the best part of baking is the joy it brings when you share your tasty creations with others. So go ahead, dig in, and revel in the sweet rewards of your DIY cake!